How to Make a Mini Peanut Butter Chocolate Cheesecake: If you’re a fan of peanut butter and chocolate, you’re going to fall in love with this Peanut Butter Chocolate Cheesecake. It’s a dessert that combines a crisp cocoa cookie crust, a rich peanut butter cheesecake filling, and a smooth chocolate ganache topping.
How to Make a Mini Peanut Butter Chocolate Cheesecake
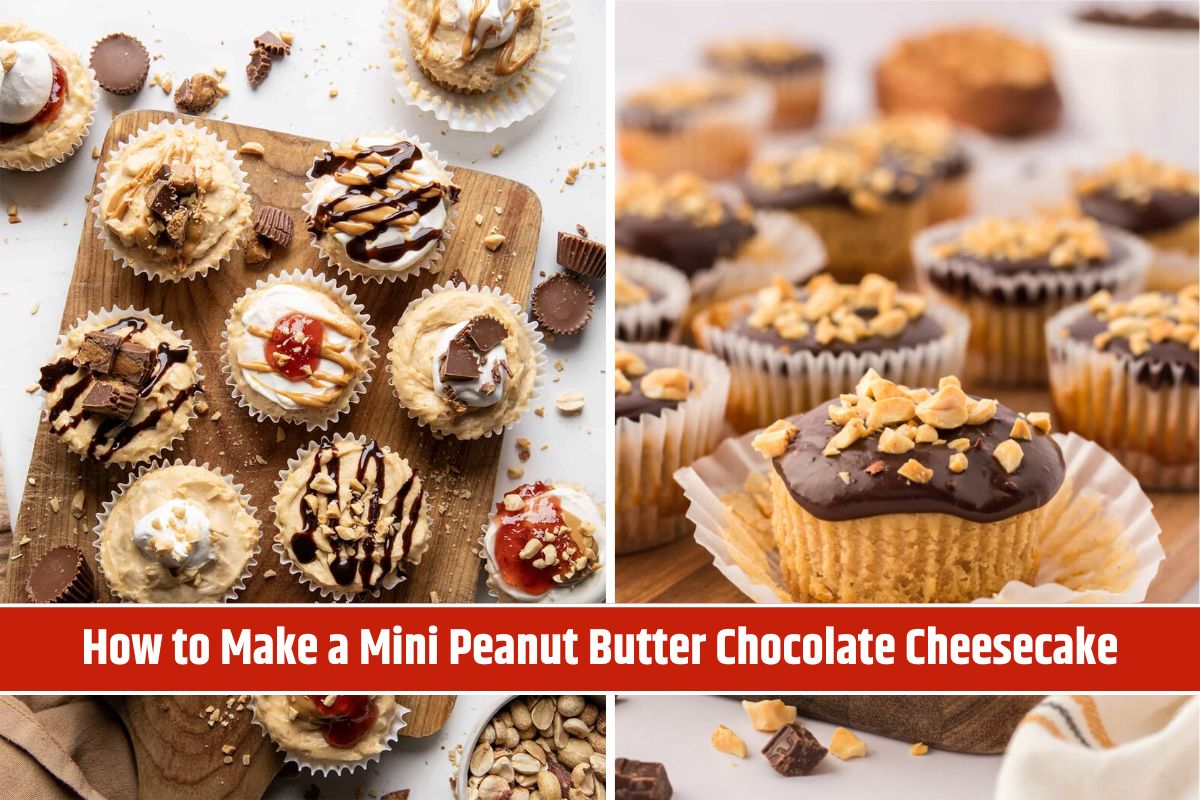
The finishing touch of mini peanut butter cups and peanuts makes it a show-stopping dessert for any occasion.
Why You’ll Love This Cheesecake
- Creamy and Decadent: The peanut butter cheesecake filling is rich, smooth, and full of flavor.
- Crunchy Cocoa Crust: A perfectly baked cocoa cookie crust adds a crispy base to the velvety cheesecake.
- Irresistible Topping: The dark chocolate ganache, mini peanut butter cups, and peanuts create a perfect balance of textures.
Ingredients You’ll Need
For the Cocoa Cookie Crust:
- 250 g digestive or graham crackers
- 2 tablespoons Dutch-process cocoa powder
- 2 tablespoons granulated sugar
- 75 g butter (melted)
For the Peanut Butter Cheesecake Filling:
- 800 g full-fat cream cheese (room temperature)
- 260 g granulated sugar
- 340 g smooth peanut butter
- 100 g sour cream
- 1 ½ tablespoons cornstarch
- 2 ½ teaspoons vanilla extract
- 4 large eggs
For the Chocolate Ganache:
- 100 g semi-sweet dark chocolate
- 100 g heavy cream
- 10 g butter
For Decoration:
- Mini Reese’s peanut butter cups
- Peanuts (chopped or whole)
Step-by-Step Instructions
Step 1: Prepare the Crust
Preheat the oven to 160ºC (325ºF) and line a 23 cm (9-inch) springform pan with parchment paper. In a food processor, blend the digestive or graham crackers, cocoa powder, and granulated sugar until you have fine crumbs.
Add the melted butter and blend again until combined. Press the mixture firmly into the bottom of the springform pan using the back of a glass to ensure an even layer. Bake the crust for 10 minutes, then let it cool while you prepare the filling.
Step 2: Make the Peanut Butter Cheesecake Filling
In a stand mixer with the paddle attachment (or using a hand mixer), beat the cream cheese on low speed for 1 minute until smooth. Add the peanut butter and mix until well combined.
Mix in the granulated sugar and beat on low speed for 1 minute. In a small bowl, mix the sour cream and cornstarch until smooth, then add it to the cream cheese mixture along with the vanilla extract. Mix until combined.
Add the eggs, two at a time, and mix on low speed until just combined. Scrape down the sides of the bowl and give the batter a final mix.
Step 3: Bake the Cheesecake
Pour the cheesecake batter over the cooled crust and smooth the top with a spatula. Place the springform pan inside a larger cake pan or wrap it in a triple layer of aluminum foil to prevent water from seeping in.
Place the cake pan in a roasting pan and fill the roasting pan with hot water (about halfway up the sides). Bake for 1 hour and 20-30 minutes. The cheesecake should have a slight wobble in the center when done.
Turn off the oven, leave the oven door slightly open, and let the cheesecake cool in the oven for 1 hour.
Remove the cheesecake from the oven, take it out of the water bath, and place it on a cooling rack. Let it cool to room temperature for about 1 hour, then refrigerate for at least 6 hours or overnight.
Step 4: Make the Ganache
Melt the chocolate, heavy cream, and butter together in the microwave or over a double boiler. Gently stir until smooth and glossy.
Step 5: Assemble and Decorate
Once the cheesecake has chilled, transfer it to a serving plate. Pour the chocolate ganache over the top, spreading it evenly with a spatula.
Decorate with mini Reese’s peanut butter cups and peanuts. Chill in the fridge until ready to serve.
Storage Tips
- Fridge: Store the cheesecake in an airtight container or wrapped in plastic wrap for up to 3-4 days.
- Freezer: To freeze, wrap the cheesecake tightly in plastic wrap and place it in an airtight container. Freeze for up to 2 months. Thaw in the fridge overnight before serving.
Helpful Tips for Perfect Cheesecake
- Use a Kitchen Scale: For accurate measurements, especially when making the crust and filling, use a kitchen scale.
- Don’t Overmix: Overmixing can cause the cheesecake to crack. Mix gently and only until the ingredients are combined.
- Water Bath is Key: The water bath ensures even baking and prevents cracks. Make sure to seal the springform pan well to avoid water leakage.
- Aluminum vs. Dark Pans: Aluminum pans distribute heat evenly, resulting in a softer texture. Dark pans absorb more heat, which can create a firmer crust.
Nutrition
- Calories: 755kcal
- Carbohydrates: 56g
- Protein: 15g
- Fat: 55g
- Saturated Fat: 25g
- Polyunsaturated Fat: 5g
- Monounsaturated Fat: 18g
- Trans Fat: 0.2g
- Cholesterol: 152mg
- Sodium: 541mg
- Potassium: 387mg
- Fiber: 3g
- Sugar: 38g
- Vitamin A: 1330IU
- Vitamin C: 0.1mg
- Calcium: 125mg
- Iron: 2mg
This Peanut Butter Chocolate Cheesecake is a decadent dessert that’s perfect for any occasion. The creamy peanut butter filling, rich chocolate ganache, and crunchy toppings make every bite a heavenly experience. Serve it at parties or indulge in it on a cozy night in—either way, it’s a guaranteed hit!
FAQ’s
1. Can I use crunchy peanut butter instead of smooth peanut butter?
Yes, you can! However, using crunchy peanut butter will add bits of peanuts to the cheesecake filling, giving it a slightly different texture. If you prefer a smooth and creamy filling, stick to smooth peanut butter.
2. Do I have to use a water bath when baking the cheesecake?
Yes, a water bath helps the cheesecake bake evenly and prevents cracks on the surface. If you want a perfect texture without cracks, it’s highly recommended.
3. What can I use instead of digestive biscuits or graham crackers for the crust?
You can substitute with Oreo cookies (remove the cream filling), chocolate wafers, or any other cookie that complements the flavors of peanut butter and chocolate.
4. Can I make this cheesecake ahead of time?
Absolutely! Cheesecake actually tastes better after chilling overnight. You can prepare it a day or two ahead, store it in the fridge, and add the ganache and decorations before serving.